Mapping Matters: How to Master Lash Mapping for Flawless Symmetry
In the lash world, precision is everything. One of the biggest make-or-break moments for any lash artist isn’t during application; it’s in the mapping. Whether you're a seasoned pro or just starting out, perfecting your lash mapping technique is essential for delivering consistent, symmetrical, and stunning results.
What is Lash Mapping (and Why Does it Matter?)
Lash mapping is the process of planning your lash design before you begin applying extensions. It’s like creating a blueprint for the perfect set, allowing you to tailor the look to your client’s eye shape, natural lash growth, and style preferences.
Without a proper map, even the best application can end up looking uneven or unbalanced. Lash mapping gives structure to your work and helps you stay consistent from one eye to the other and from one appointment to the next.
Step-by-Step Guide to Flawless Lash Mapping
1. Analyse the Eye Shape
Start by observing your client’s eye shape. Are they almond, round, hooded, or downturned? Your mapping will change depending on what you want to enhance or correct. For example:
• Almond eyes suit most styles, but cat eye or open eye often work beautifully
• Downturned eyes benefit from a lifted look, avoiding heavy lengths in the outer corners
• Round eyes may need a softer taper to avoid an overly “surprised” look
2. Choose the Right Style
There are a few common lash styles:
• Doll Eye/Open Eye – Longer lengths in the centre to open up the eyes
• Cat Eye – Gradually increasing length towards the outer corners
• Natural Eye – A natural-looking blend with the longest point just off-centre
• Kitten Eye – A softer version of the cat eye, perfect for smaller eyes
Tailor the style to your client’s features, not just their preference.
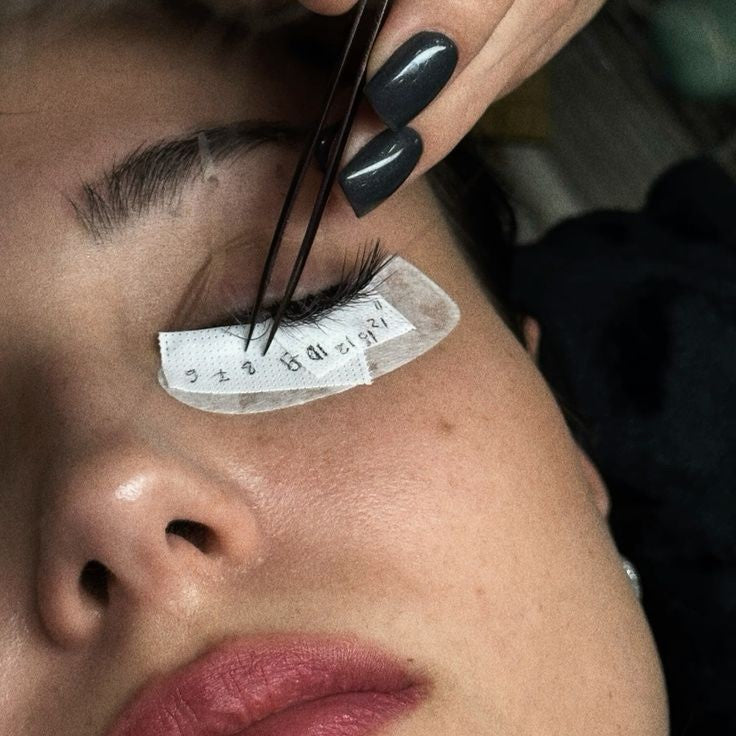
3. Divide the Lash Line
Using a marker pen (like a fine-tip eyeliner pencil or mapping pen), divide the under-eye pad into sections, usually 5 to 7, depending on the style. Mark where you want length transitions to occur. These will guide you during the application and help maintain symmetry.
4. Choose the Right Lengths
Lengths should flow naturally across the eye. Avoid using dramatically long lashes unless the natural lashes can support them. Mixing lengths too abruptly can lead to a messy or spiky look, especially with volume lashes.
5. Mind the Curl and Diameter
Don’t forget, mapping isn’t just about length. Your choice of curl (C, CC, D, etc.) and diameter (for classics) affects the overall look. For example:
• C curl gives a natural lift
• D curl is bold and dramatic, ideal for special occasions or deep-set eyes
Use consistent curls throughout unless you're creating a hybrid or a specific design effect.
6. Check Both Eyes
Mapping one eye is only half the job. Check your map on the second eye and make sure everything lines up. Lashes don’t always grow symmetrically, so minor tweaks may be needed to ensure the final result looks even.
Tips for Better Mapping Every Time
• Take photos of your best sets and map them for future reference
• Use pre-marked pads if you’re new to mapping, they’re a great training tool
• Ask your client to look straight ahead when you double-check your map before starting
• Keep notes of what worked for each client to keep results consistent at future appointments
Lash mapping is the foundation of every flawless set. It gives you confidence, saves time during application, and ensures your clients walk away with symmetrical, flattering lashes every single time.